Background:
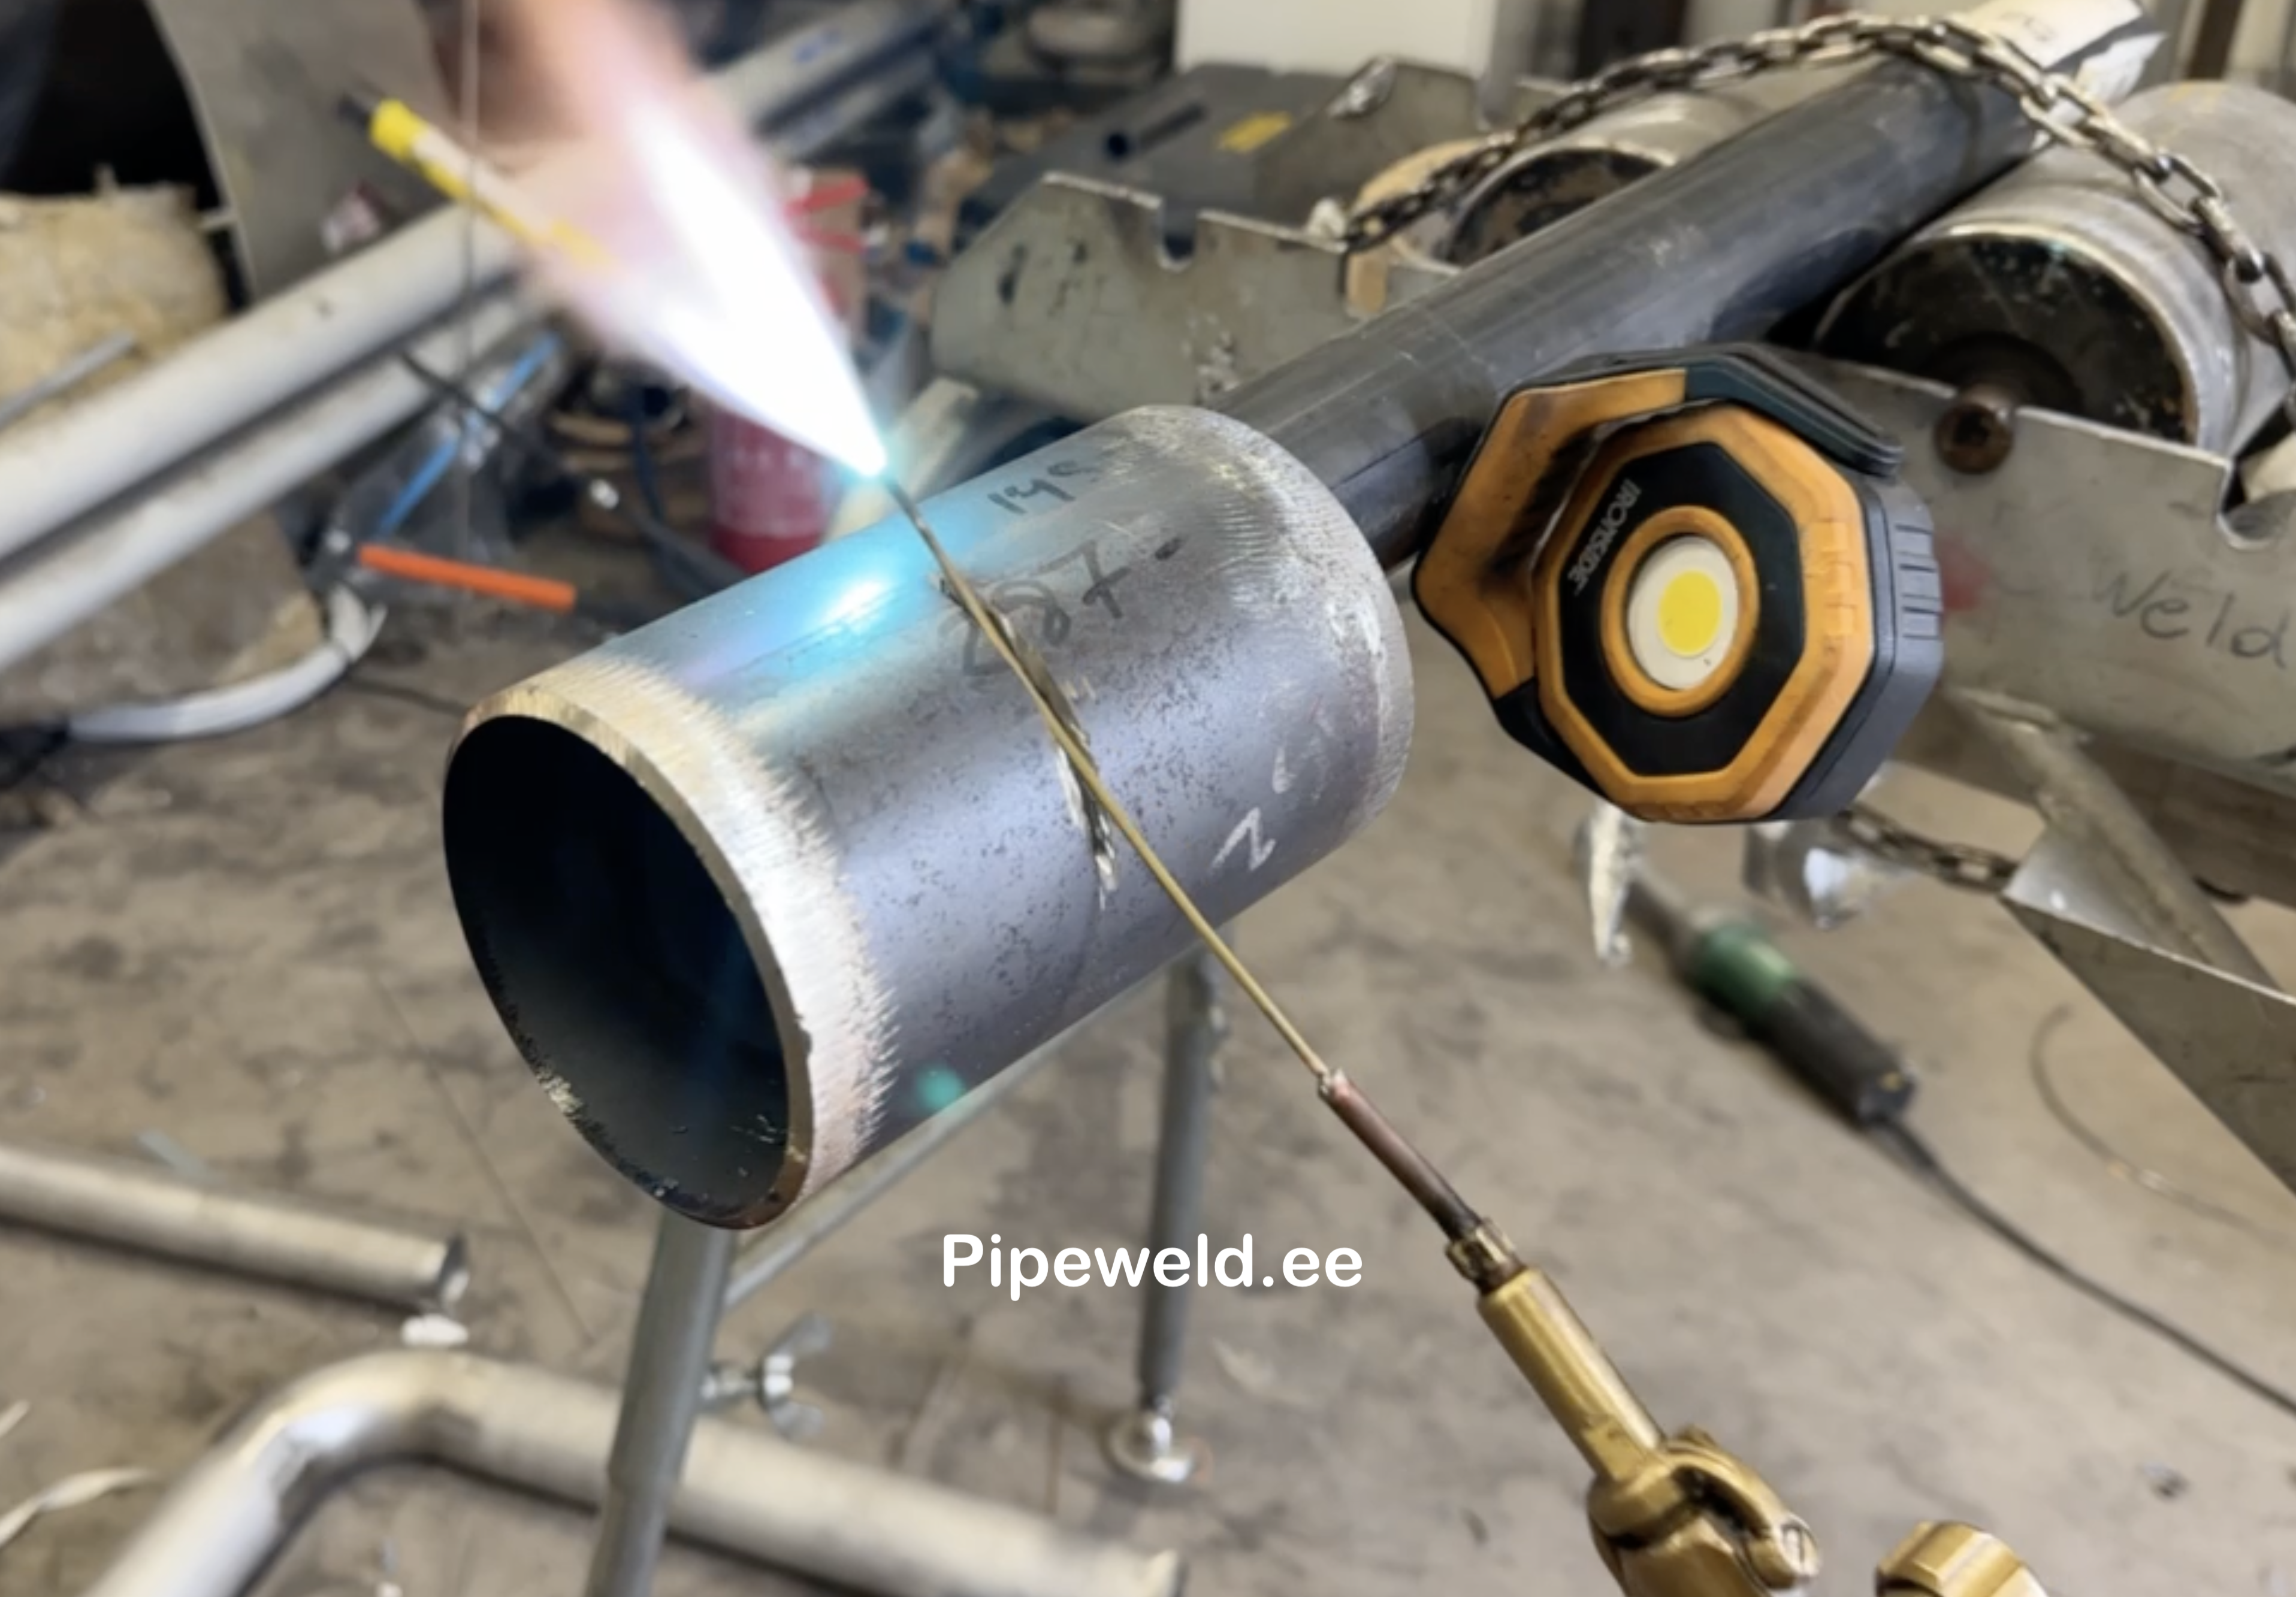
Once, Pipeweld.ee (Industrial piping contractor), was awarded a contract to construct an 8 km heating pipeline in Sweden. The project presented significant challenges: a twin DN200 mm double-insulated pipeline with a 6.3 mm wall thickness. Installation relied on excavators, and the welding was carried out using the 311 gas-welding method, as specified by the client. All welds underwent 100% radiographic (RT) inspection to Group B standards. The demanding conditions inevitably led to welding issues. Picture the frustration of finding a tiny pore, lack of fusion, or root concavity on just a 1 mm section of an overhead weld in the 6 o’clock position—or on a lower weld at the 12 o’clock position. These spots were incredibly difficult to access, and at times, both welds had to be cut open to address even minor defects.
This raised a critical question: how can defects such as lack of fusion, porosity, or other welding flaws be resolved quickly and with absolute certainty?
The answer came in the form of a life-saving nozzle we developed. And let me tell you upfront—this tool works seamlessly on larger diameters, ensuring defects are repaired efficiently and reliably. With the right tools, knowing how to fix these welding challenges becomes significantly easier.
Welding Defects – Fixing Lack of Fusion and Other Challenges
In this article, we’ll explore the design principles of acetylene-oxygen torches and guide you through creating your own custom solution. By following safety standards, we’ll demonstrate how to tackle lack of fusion and significantly cut down weld repair time.
Topics We’ll Discuss:
- What is flashback, and why is it dangerous?
- Main causes of flashback in a gas torch.
- How does an injector work?
- How to test a gas torch before starting work.
- Gas welding safety techniques.
- Designing an acetylene torch with essential considerations.
- Building a custom torch for use in hard-to-reach areas.
- Testing the torch before performing a root weld.
- Tips for using a new torch for root welding.
- Additional useful advice for working with gas torches.
- Weld Defects in the Root Pass: What is Flashback, and Why is it Especially Dangerous During Repairs?
- Flashback occurs when the fuel mixture ignites inside the torch channels. This can lead to the acetylene hose catching fire, potentially resulting in an acetylene cylinder explosion—a severe safety hazard.
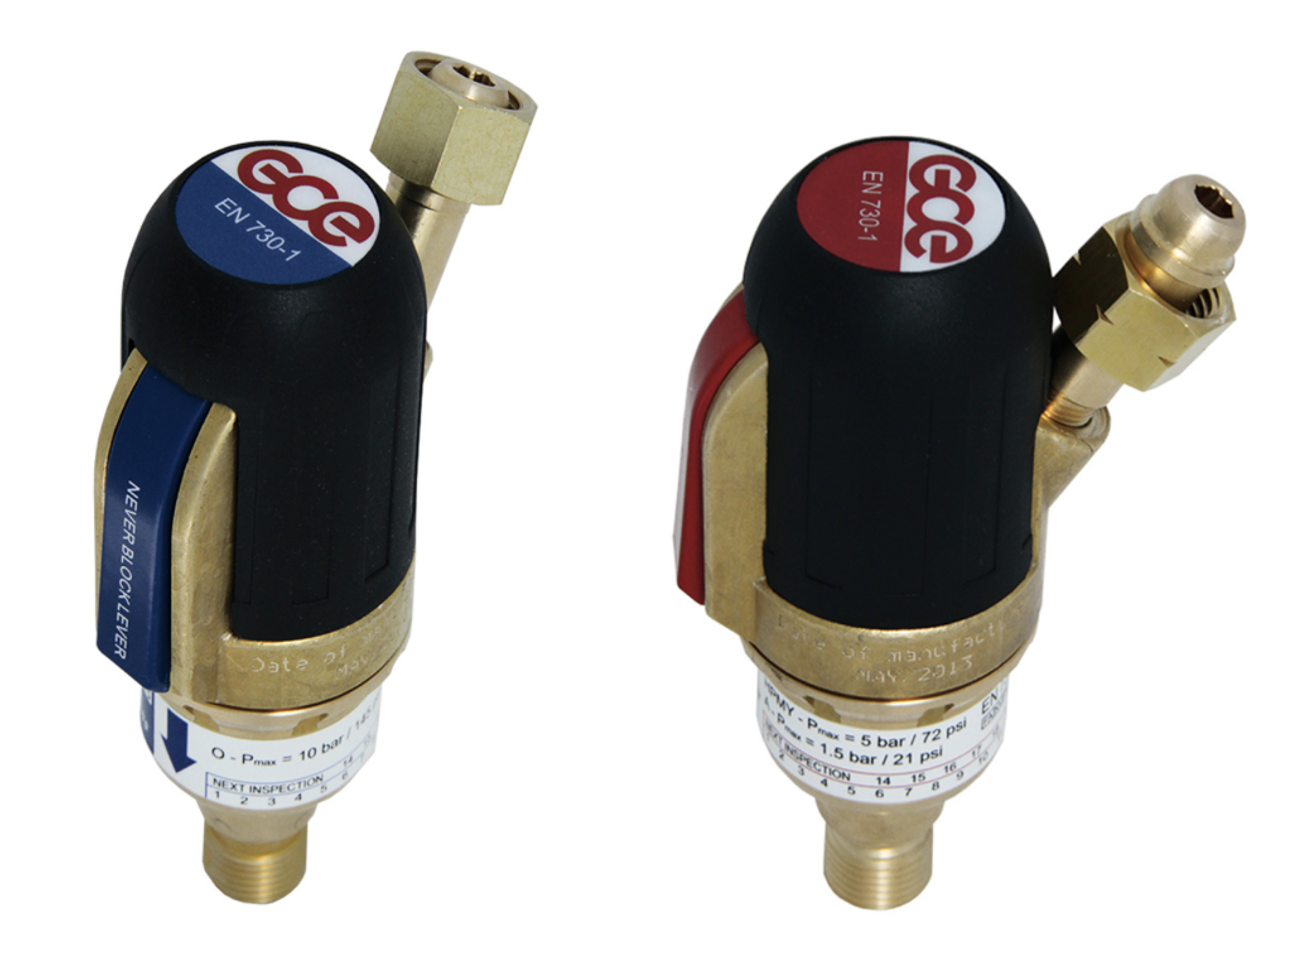
- To prevent gas cylinder explosions while fixing welding defects, it’s essential to install flashback arrestors on both gas cylinders. This measure is critical for ensuring a safe working environment.
Causes of Flashback During Acetylene Welding and How to Address Defects Like Lack of Fusion, Root Concavity, and Porosity
Every combustible material burns at its own specific speed. In acetylene welding, the speed at which gas exits the torch nozzle is equally critical. Proper adjustment of the gas torch ensures that these speeds are perfectly balanced.
Main Causes of Flashback During Welding and Repairing Defects Like Lack of Fusion:
- Mismatch between the burning speed of the gas mixture and the gas exit speed from the torch nozzle.
- If the burning speed exceeds the exit speed, or vice versa, flashback is likely to occur. This is the most common cause.
- Clogged Nozzle:
- A blockage in the nozzle disrupts the gas exit speed and may cause turbulence in the gas mixture.
- Incorrect Gas Cylinder Pressure:
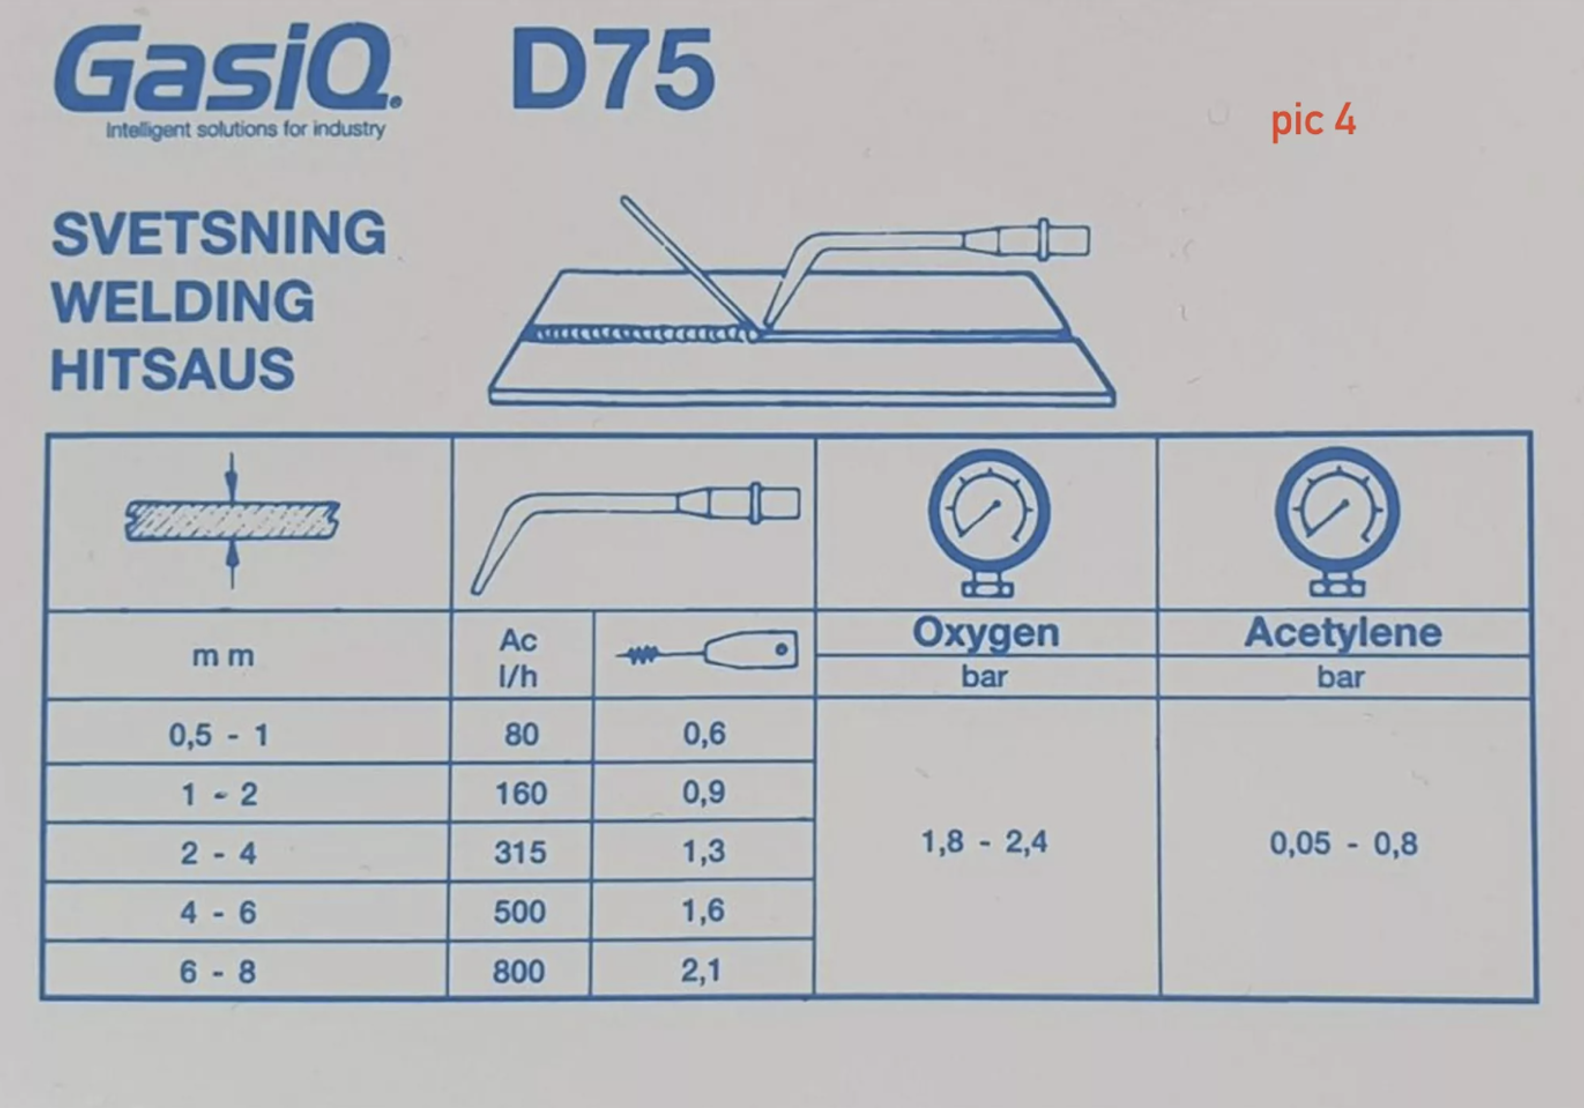
- Acetylene pressure should always remain between 0.2 and 1.2 bar, even when oxygen is supplied at 3 bar. Refer to the gas torch power and pressure ratio table for precise settings (see Pic 4).
- Improper Torch Ignition:
- Errors in adjusting the oxygen and fuel gas ratios can lead to flashback.
- Overheating of the Torch Nozzle:
- Excessive heat causes premature ignition of the gas mixture inside the nozzle, resulting in flashback.
- Excessive Wear or Misuse of the Nozzle:
- Worn or improperly used nozzles may lead to misalignment between the inlet and outlet holes (see Pic 2).
- Barrel-Shaped Channel Narrowing and Converging Nozzle:
- This condition disrupts the gas flow and necessitates replacing the nozzle (see Pic 1).
- Shortened Channel Exit Section:
- If the exit section is less than three times the diameter of the exit channel, replace the nozzle (see Pic 3).

How the Torch Injector Works?
From the listed causes of flashback, two key factors stand out as the most critical for preventing issues:
- Gas Flow Speed:
- Determined by the pressure settings in the hoses and the injector.
- Proper Gas Mixture Ratio:
- Achieved through the injector’s precise functionality.
Now, let’s dive into the workings of the injector, a crucial component in ensuring the correct gas mixture and preventing welding defects like lack of fusion.
Injector torches operate by introducing low-pressure fuel gas (acetylene) into the mixing chamber. This is accomplished through the action of a high-pressure oxygen stream, which draws the fuel gas into the chamber.
This process, known as injection, is made possible by the injector device. The suction effect created during this process ensures proper gas mixing, essential for efficient and defect-free welding.
By understanding the injector’s role, you can optimize its settings to maintain safe and effective welding operations.
Testing Methods for a Welding Gas Torch Before Addressing Lack of Fusion and Other Defects
Before using a new torch and nozzle, it’s crucial to ensure the injector is functioning correctly. Follow these straightforward steps to test it:
- Disconnect and Check for Suction:
- Unscrew the acetylene hose from the torch.
- Open the oxygen supply on the torch.
- Fully open the acetylene supply.
- Place your thumb over the acetylene inlet nipple (where the hose was disconnected).
- Check for suction—your thumb should stick to the nipple.
Result: Suction indicates that the injector is working properly.
- Understanding Vacuum Levels:
- The vacuum in the acetylene channels before the injector typically ranges between 35-275 mm Hg in an unlit torch and 25-50 mm Hg in a lit torch.
Note: The pressure drop in a lit torch is usually due to incomplete oxygen flow during combustion, which creates this variation.
By performing these checks, you can ensure your gas torch is ready for use, minimizing risks and ensuring efficient repairs of welding defects like lack of fusion.
Safety and Personal Responsibility in Gas Welding, Especially with a DIY Torch – IMPORTANT!
I’ve studied extensively how acetylene torches work and what to prioritize during operation. Through research and hands-on experience, I’ve been able to address all my questions.
However, it’s important to note: I cannot assume responsibility for any conclusions you or others may draw from this material. The responsibility for the design, construction, and safe use of a DIY torch rests solely with you. Please ensure you fully understand the risks and safety measures involved.
Designing and Building Your Torch While Following Key Rules
From my observations, the injector and the mixer are the most critical and delicate components in a torch. If you plan to build your own, the best approach is to acquire a factory-made injector with a mixer and adapt a copper capillary to fit. These components are readily available at large hardware stores in Europe or through online marketplaces.
For my torch, I chose a brass tube—an excellent material for this type of application. The specifications are:
- Outer Diameter: 2 mm
- Wall Thickness: 0.5 mm
- Gas Channel Diameter: 1 mm
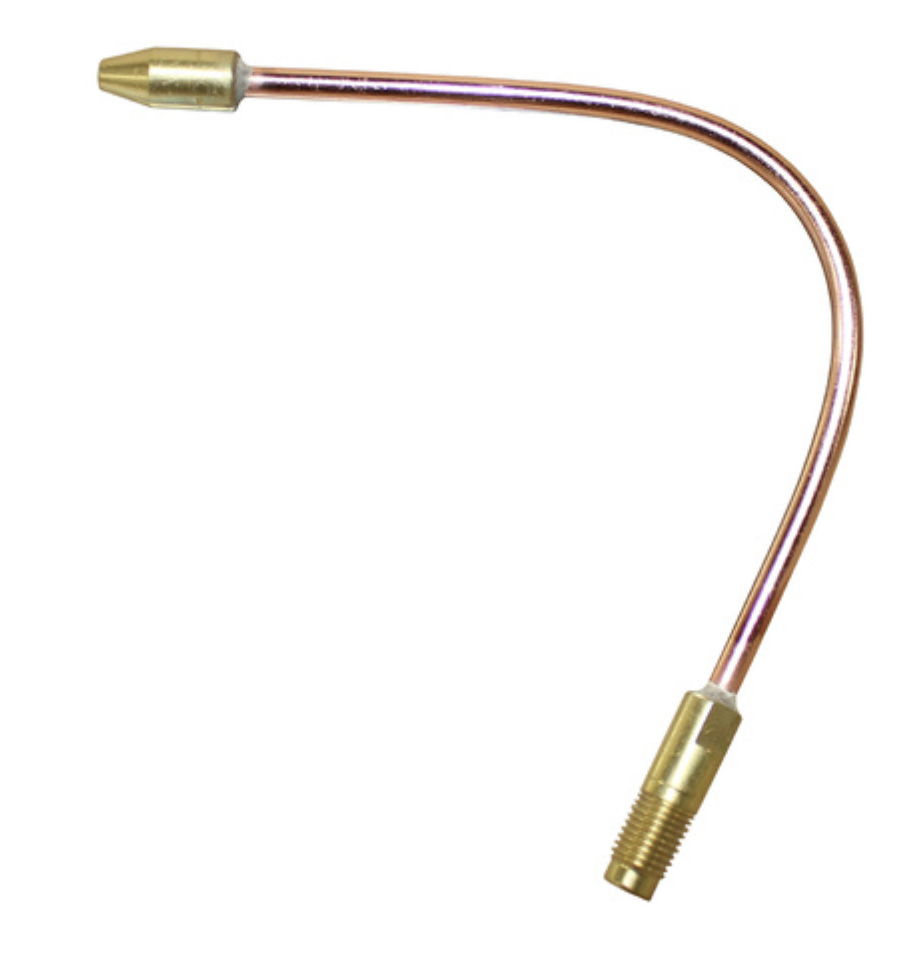
Through trial and error, I found that a brass tube with a length of 150–250 mm works well with an injector and mixer from a factory nozzle rated for 500 liters per hour. The nozzle itself should be made of copper, allowing for flexibility.
For reference, you can look up models like:
HARRIS ACETYLENE FLEXIBLE BRAZING WELDING TIP (Google for more details).
Preparing Your Torch: Final Steps
After assembling your torch, follow these steps to complete it:
- Cut the copper tube from the torch, leaving 2-4 cm of length.
- Solder your capillary tube to the copper tube.
- Your torch is now ready for testing!
Testing the Torch for Fixing Root Concavity, Lack of Fusion, and Other Welding Defects
- Set the Output Pressure:
- Adjust the pressure on both gas cylinders to the correct levels (refer to Pic 4).
- Check Acetylene Vacuum:
- Ensure the acetylene supply vacuum is functioning correctly using the methods described earlier.
- Ignite and Adjust the Flame:
- Perform the first ignition and fine-tune the flame to achieve standard welding parameters.
- Troubleshoot Flame Instability:
- If the flame isn’t stable and you can’t achieve proper combustion, the issue might be excess solder inside the copper tube, partially or fully obstructing the gas flow. In this case, you’ll need to rebuild your torch.
- Perform Initial Testing:
- Once stable combustion is achieved, perform a short test weld lasting 1-2 minutes. After extinguishing the torch, touch the injector with your bare hand. If it hasn’t overheated during welding, the torch passes this initial test.
- Conduct Extended Testing:
- Continue testing with longer welds, such as 3-5 minutes. This was the final test for my torch, as I intended to use the nozzle for no more than 2 minutes for root pass repairs. Since pipes are enclosed spaces where heat accumulates faster, I doubled the test time in an open environment.
- Monitor Injector Temperature:
- If the injector temperature exceeds 200°C, the risk of flashback increases. Flashback typically occurs at 300°C, while a properly functioning factory injector operates at 40-50°C. Measure accurately and ensure safe temperature ranges.
Using the Torch for Root Pass Welding
While repairing weld defects such as root concavity or lack of fusion through a welding gap, I occasionally experienced sudden flameouts.
This phenomenon didn’t happen consistently, but when it did, it was significant. Although I couldn’t find a definitive solution, ensuring proper ventilation inside the pipe to improve combustion proved crucial.
Additional Tips and Observations
- Defect Repairs: Welding defects like lack of fusion, porosity, deep pores, root concavity, and others can be repaired using this method. However, it requires skill and precision.
- Nozzle and Injector Alignment: Ensure the nozzle’s exit channel diameter matches the mixing chamber channel diameter, while the injector channel diameter should be three times smaller.
- Torch Airflow Requirements: G2 and G3 torches with replaceable tips must draw air from the atmosphere through the acetylene fitting at a rate matching the nominal acetylene consumption at maximum oxygen pressure (per the technical specifications).
- Nominal Acetylene Consumption: Each torch tip should achieve nominal acetylene consumption at minimal acetylene pressure and free flame combustion with fully open valves.
- Material Choice: Metal torch components should be made from brass, as it is ideal for the demanding conditions of gas welding.
Share Your Thoughts!
Have questions, suggestions, or comments? Feel free to leave them in the comments section below this article. Your feedback is invaluable, and I’m here to help you effectively repair welding defects like lack of fusion, root concavity, or porosity.
Author- Ilja Arhi
You may also like to read.
Miter Bend Calculations For Fabrication Purpose
What is Pickling & Passivation of Steel Pipes?
Hydrotest Procedure for Piping system


